A workflow is the integration itself. This is where you define the integration logic and how data is mapped between applications.
Add a new workflow
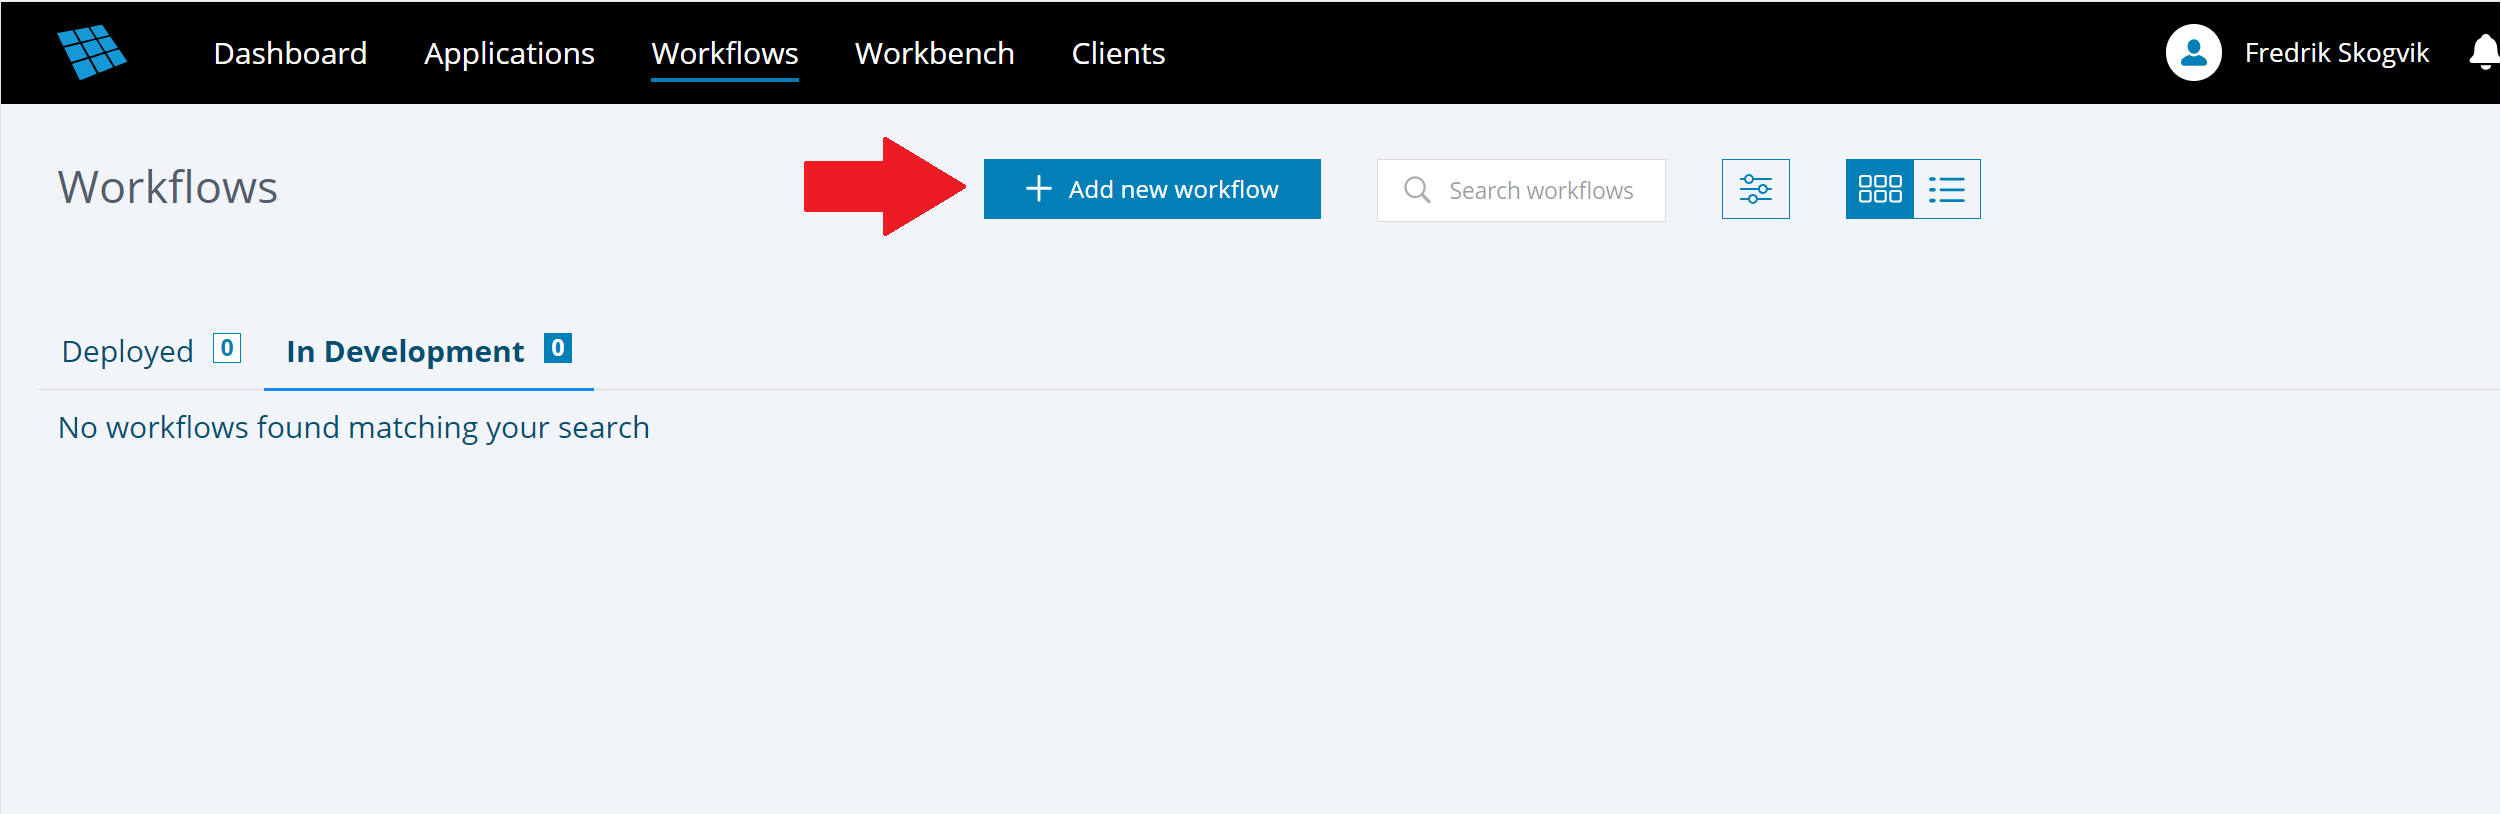
To create a workflow go to the Workflows section, and click the “Add new workflow“ button on the top of the page:
You will then be given two options for how to create the workflow:
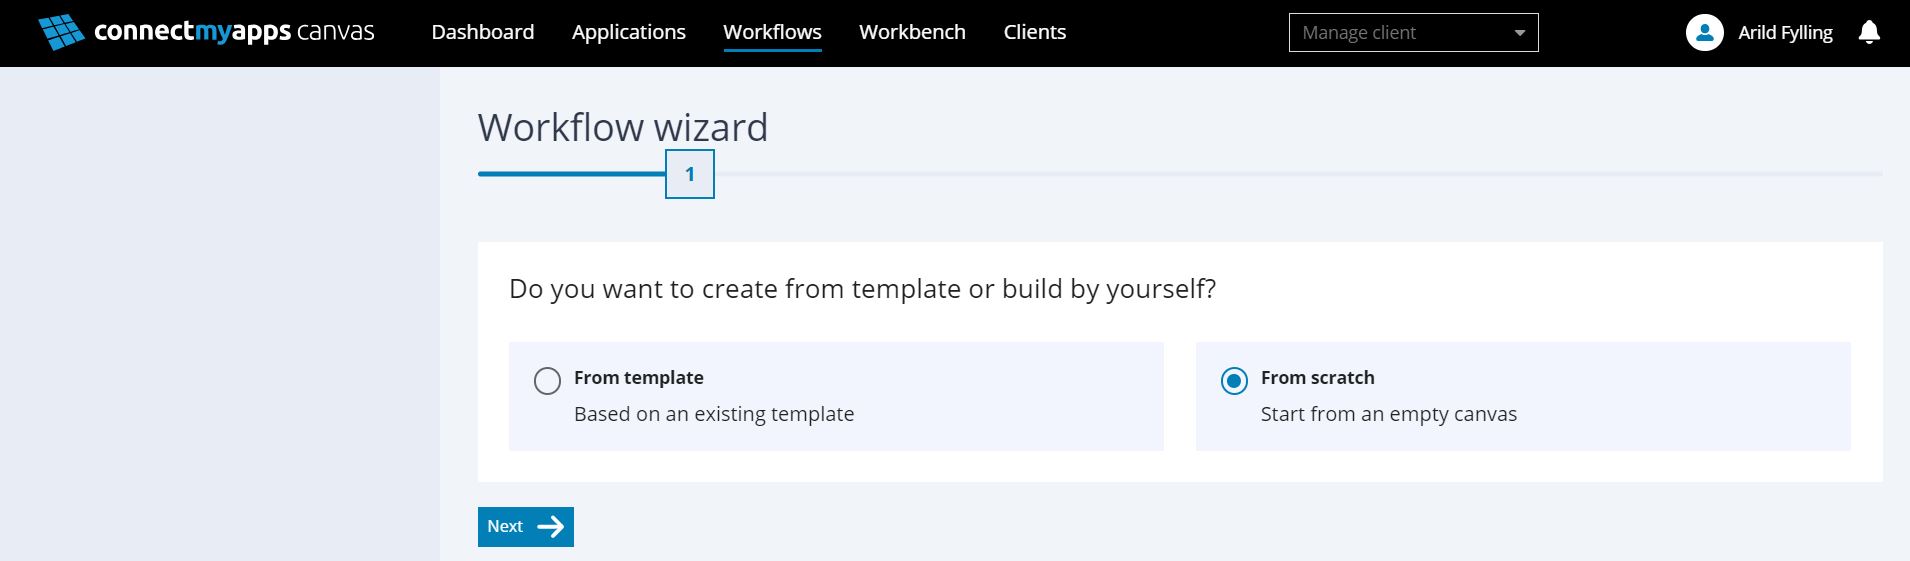
- "From template" "lets you quickly set up an integration based on a ready-made workflow template.
- "From scratch" lets you build a new workflow from a blank starting point.
In our case, we will choose "From scratch".
Select the app(s) to use in the workflow
When you choose to create a workflow from scratch you will be presented with the following view, where you can select the apps to use in the workflow:
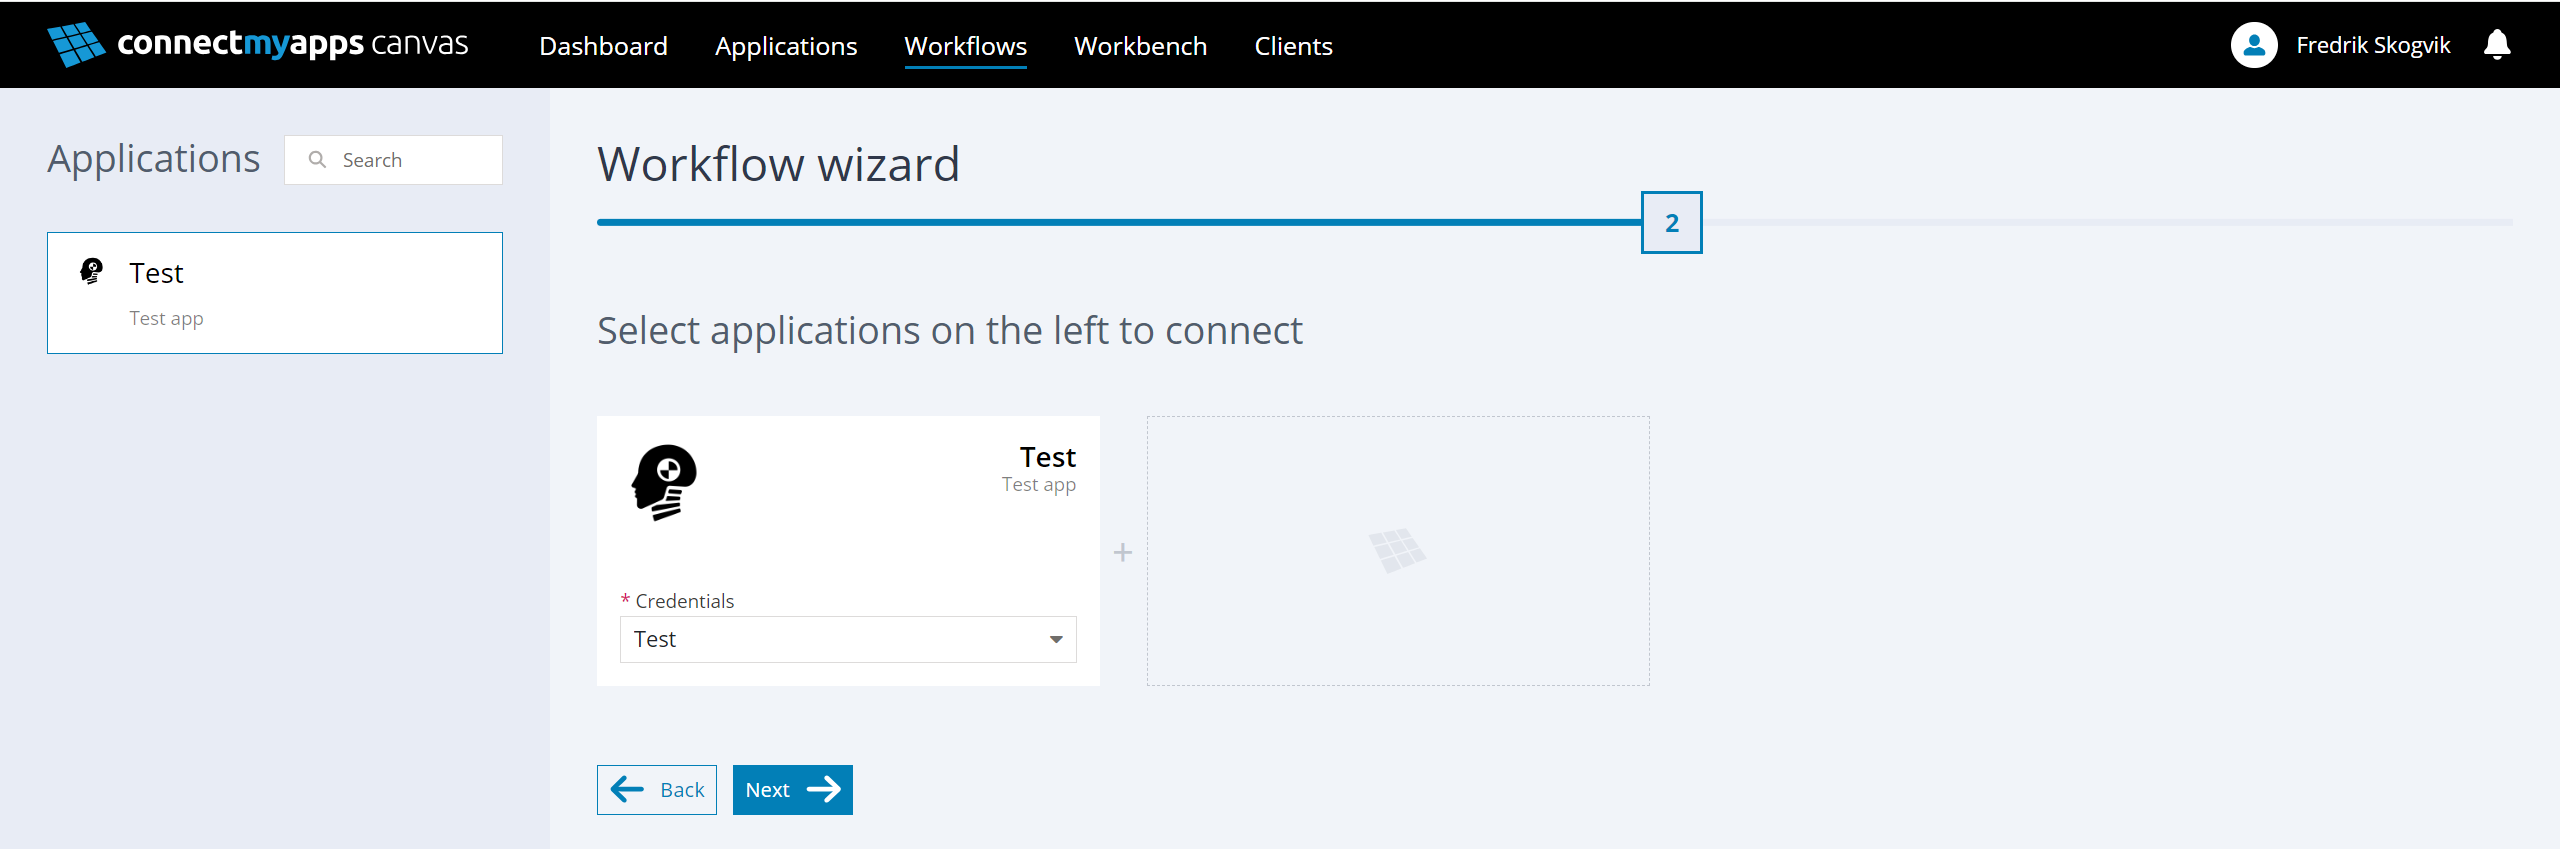
- Choose the apps you want to connect in the list on the left. In our case we will just be using one app, the Test app, both for getting and posting data
- Click the "Next" button to proceed the next step.
- Give your workflow a name and description and click "Finish"
The workflow editor
You will then be presented with the workflow editor:
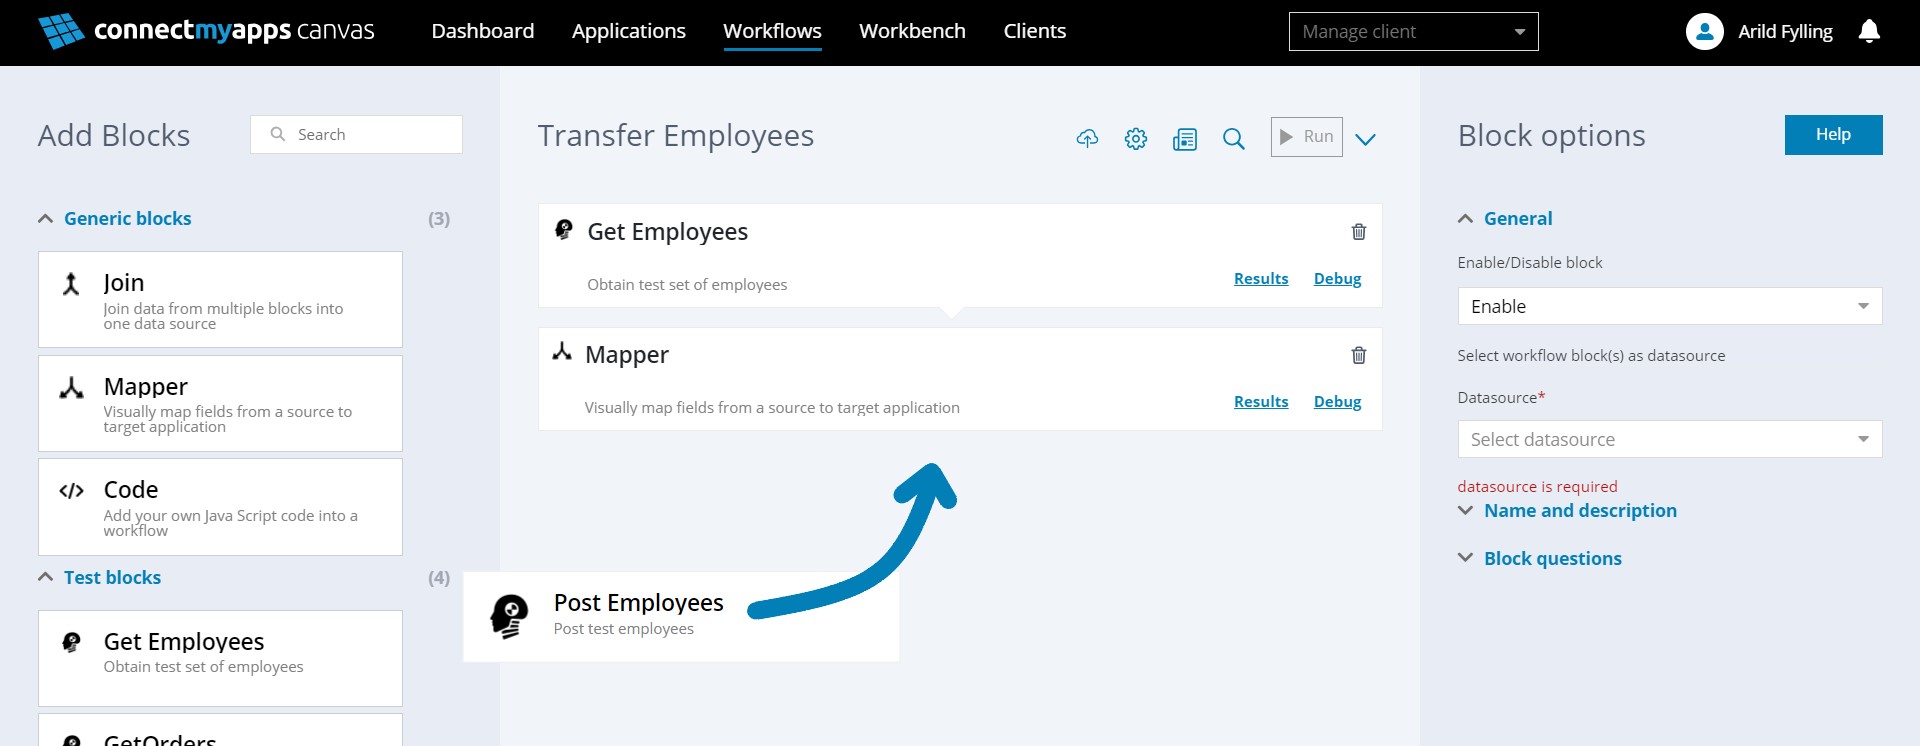
Here we will add the blocks that will make up the workflow logic. As explained previously, a block is a re-usable, modular piece of code that executes one or more tasks.
- On the left side you can see a list of ready-made blocks available for the apps you selected for the workflow (expand the dropdown to see them all). In this case you see the blocks available for the Test app.
- You will also see the generic blocks, including Mapper, Code and Join, which can be used for any app.
- In the center you have the "Canvas" area. You can drag-and-drop blocks from the blocks menu onto the Canvas.
- On the right hand side you have your settings menu. When you click a block the settings menu will show settings specific to the block (under "Block questions"), allowing you to customize its behavior without having to edit the code.
- There is also a main settings menu for the workflow that can be accessed by clicking the blue cog icon ⚙ on the top of the page.
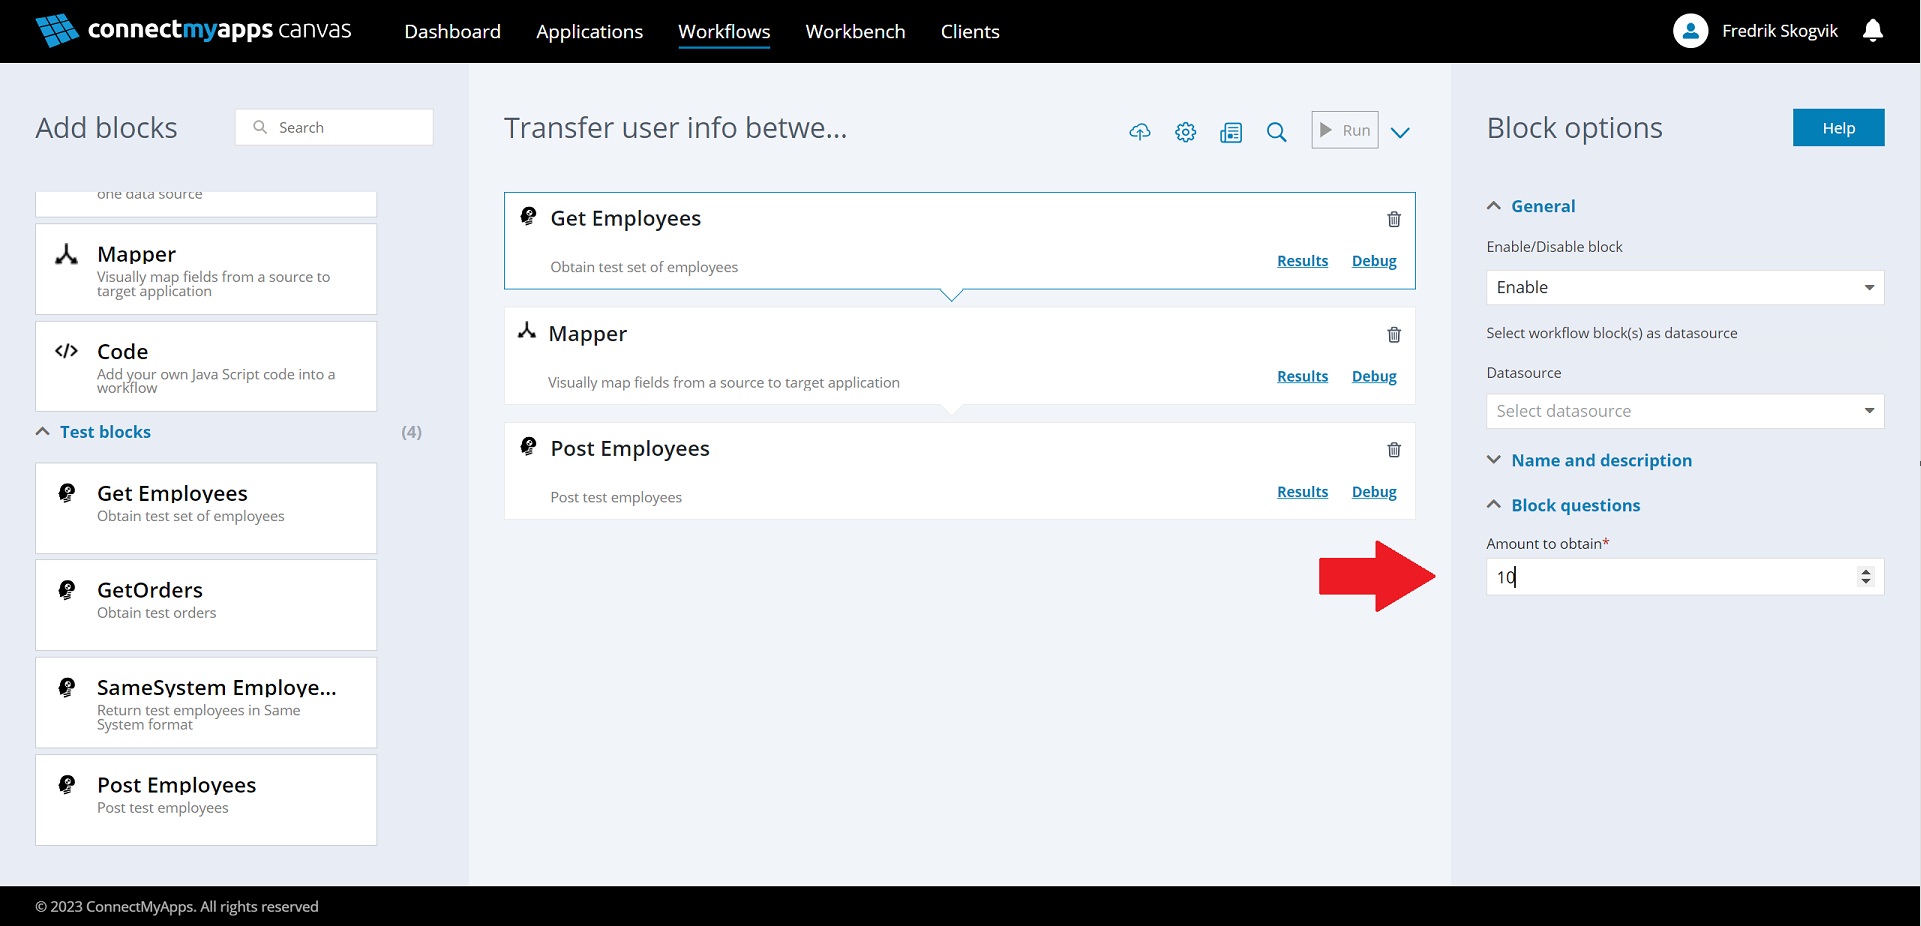
To start building the workflow, simply drag-and-drop the three blocks shown in the screenshot above onto the Canvas.
For our demo workflow, we will need:
- The "Get Employees" block will fetch employee dummy data from the Test API
- The "Mapper" block will be used to map data and fields between the two blocks other blocks.
- The "Post Employees" block will send the updated employee data back to the Test API
Configure the blocks
Now that the blocks have been added, we need to configure them a bit.
If you click each of the blocks you will see the available block settings on the right side. Some of these settings are marked as required information with a red * symbol.
-
For the "Get Employees" block, there is an option under "Block questions" to specify how many dummy employees to retrieve. You can select 10.

-
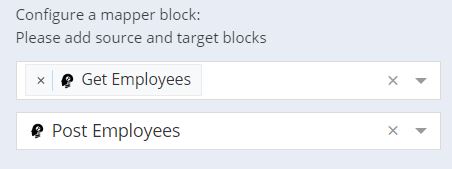
For the "Mapper" block, set the source to be the Get Employees block, and the target to the Post Employees block
-
For the "Post Employees" block, choose the Mapper block as the input, under the "Datasource" option:

Now is a good time to save the changes you have made. Click the save icon to save your workflow.
Configure the mapping table
Most integrations need to do some translation of data passed between apps. This is what the Mapper block is for. The Mapper block lets you to create a mapping table using drag-and-drop, to specify how incoming data should be structured for output. It is also possible to use functions to transform data in the mapping table. See the Mapper block documentation for more info.
In this case, we are using the Test API in both ends, so the data does not really need to be transformed with a Mapper block. But for the sake of the exercise, let us pass the data through a Mapping block to see how it works.
Click the Map model button. This will cause Canvas to sample the data from the Test API to get a dynamic list of fields in the incoming data (the schema).
You will then be presented with a mapping table, similar to a spreadsheet, with a Source and Target column. (To see all the fields you will need to click to expand the list on the left side and the Target column on the right side.)
Drag-and-drop the fields from the list on the left to the Source column, as shown in the screenshot below, to map fields between the input block (Get Employees) and the output block (Post Employees):
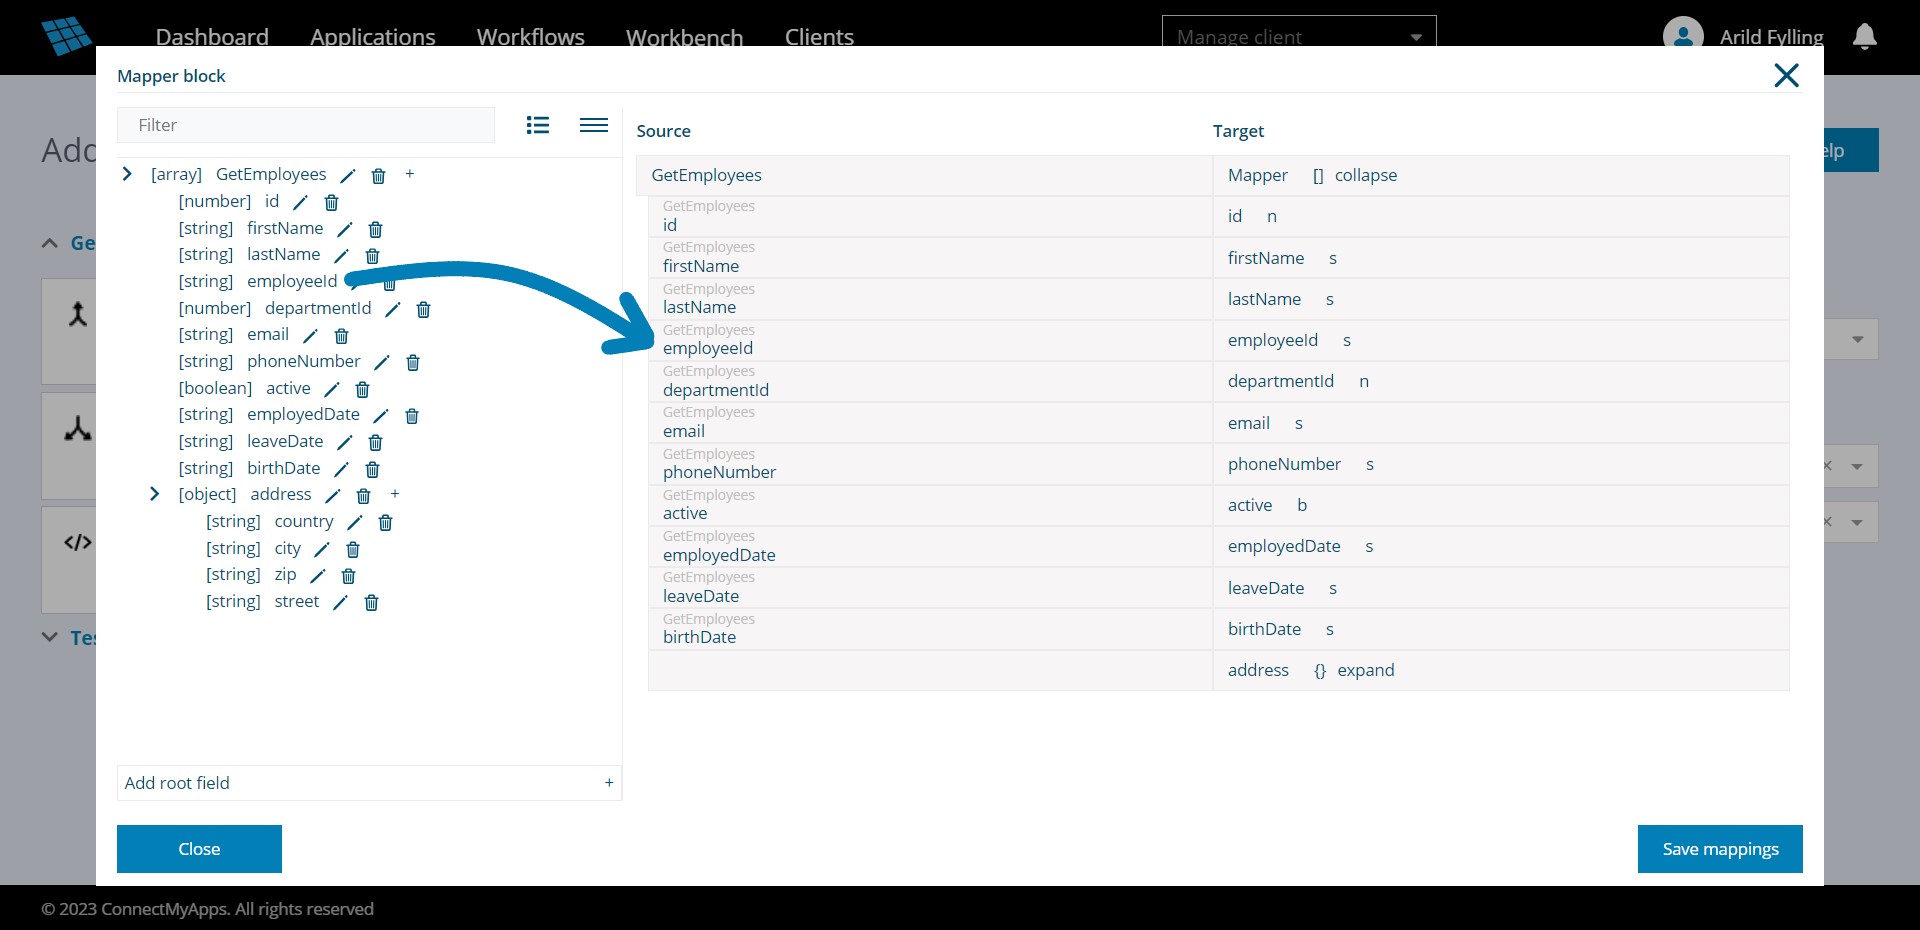
In our example, the incoming field names are the same as the outgoing field names, as the same Test API is used both as input and output. But when you are connecting different apps with different schemas you see different field names in the Source and Target columns.
When you are done configuring the mapping table you may save the workflow and move on to step 3.