Notifications
In this article we will go over the notification settings available in Canvas.
We will outline where you can find the settings, how to enable notifications for yourself and others on both E-mail and SMS.
Accessing your profile page
The notification Settings are found in your profile page.
If you look in the top right corner of the Canvas homepage in the navigation bar you will see your user name.
Click on your username, then click on "profile" in the dropdown menu.

The profile page
You will now come to your profile page. Here you can see and edit your account details such as your E-mail and phone number.
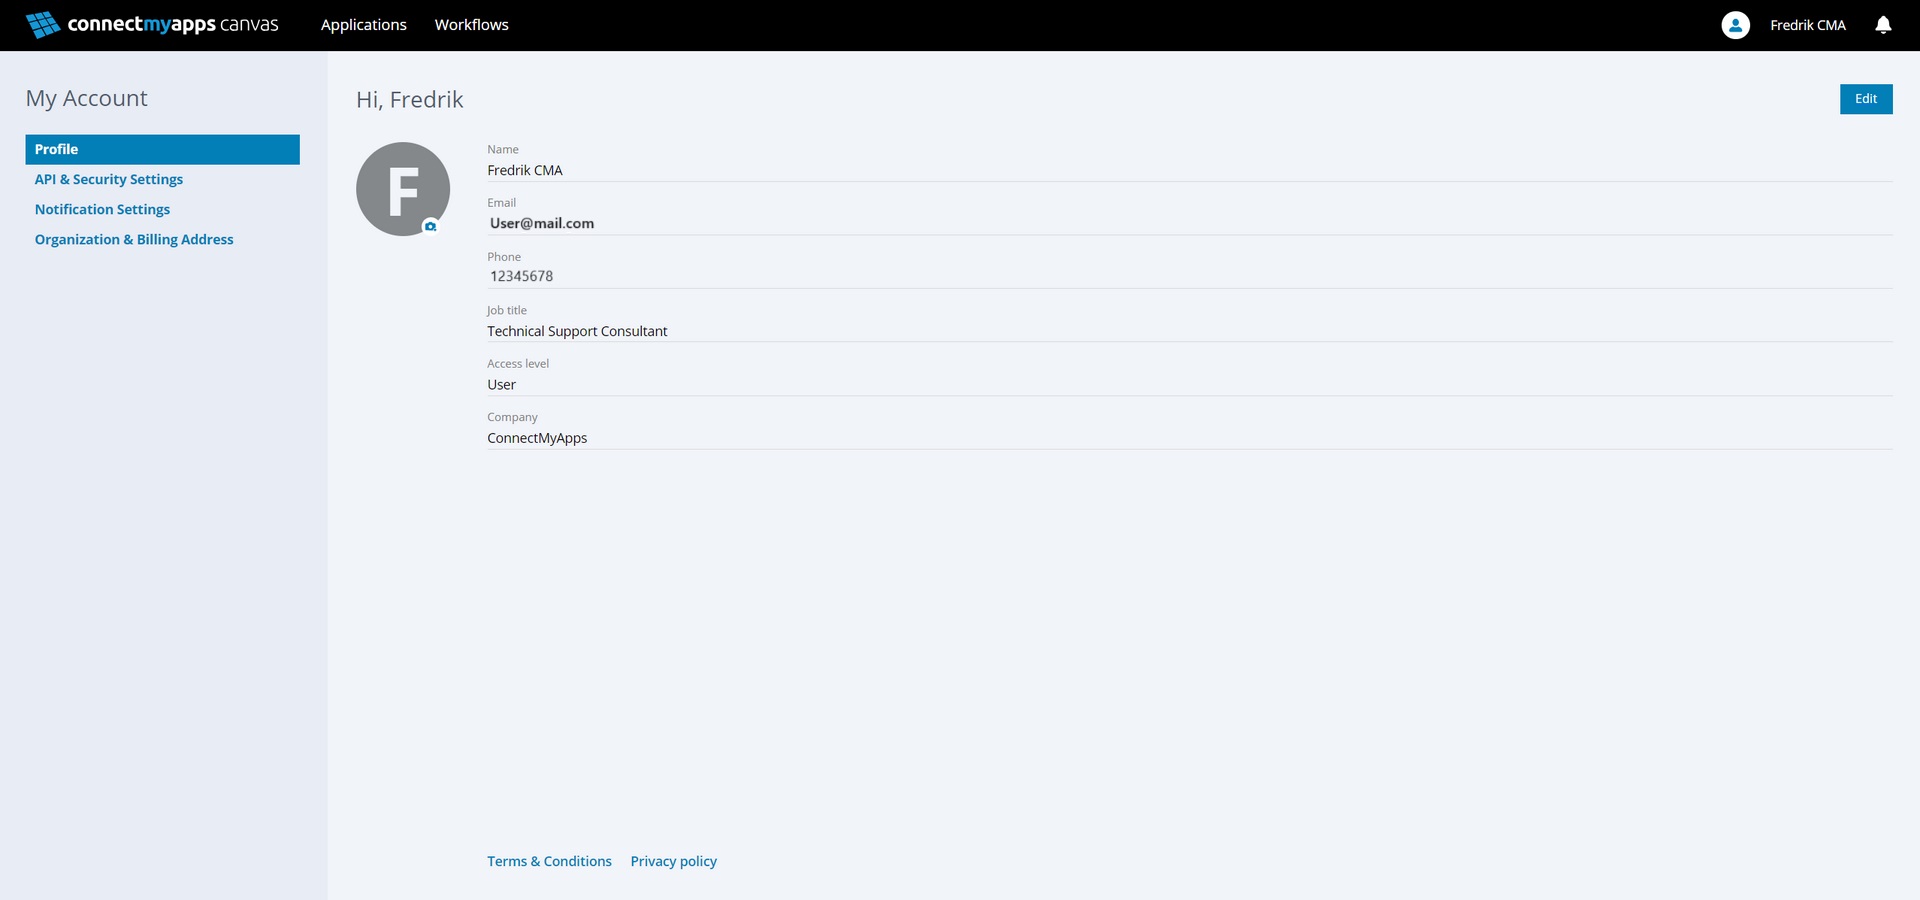
In the menu on the left you will see some options, click the "Notification Settings" page to go to the notification options.
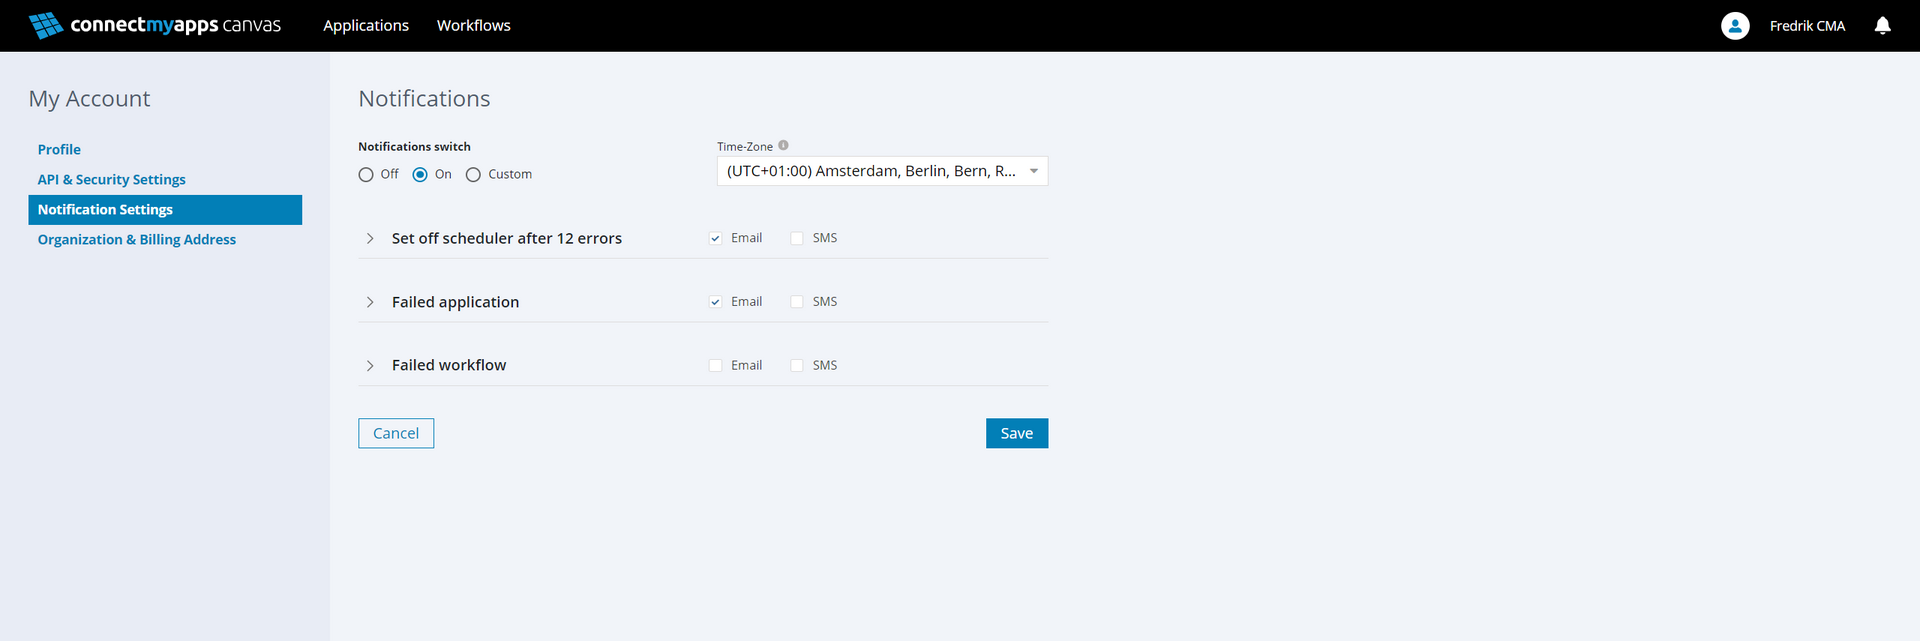
Here you will see a few options.
Notifications switch
Off - No notifications will be sent for this account.
On - Notifications will be sent to the email registered on this account, all notifications will be sent to the account email.
Custom - Adjust each individual setting to your liking, you can setup additional E-mail addresses and enable SMS notifications. You can also choose when the notification should be delivered
Time-Zone
Here you can set your time-zone.
Notification types
Set off scheduler after 12 errors
integrations can fail for various reasons, for example there can be an error connecting to one of the applications.
Some data in one end of the integration can be wrongly formatted, like a phone number ending up in a field for e-mail addresses, which causes the integration to crash.
Should the integration fail for any reason it will try to run again 12 times, after this the scheduler will be disabled and it will no longer run automatically.
Failed Application
If an Application should lose it's authentication for any reason, this could be because a token expires or a password is changed.
An entire workflow might fail because one of the applications is not providing the required data. So it is important to ensure that the applications are working as expected.
Failed Workflow
If a workflow fails once it will remain on schedule and retry, this setting will you send a notification for each failure and retry.
Adjusting the settings
You can edit the custom settings to your liking by clicking the "custom" button. This will allow you to adjust the options beyond the standard configuration in the "on" setting.
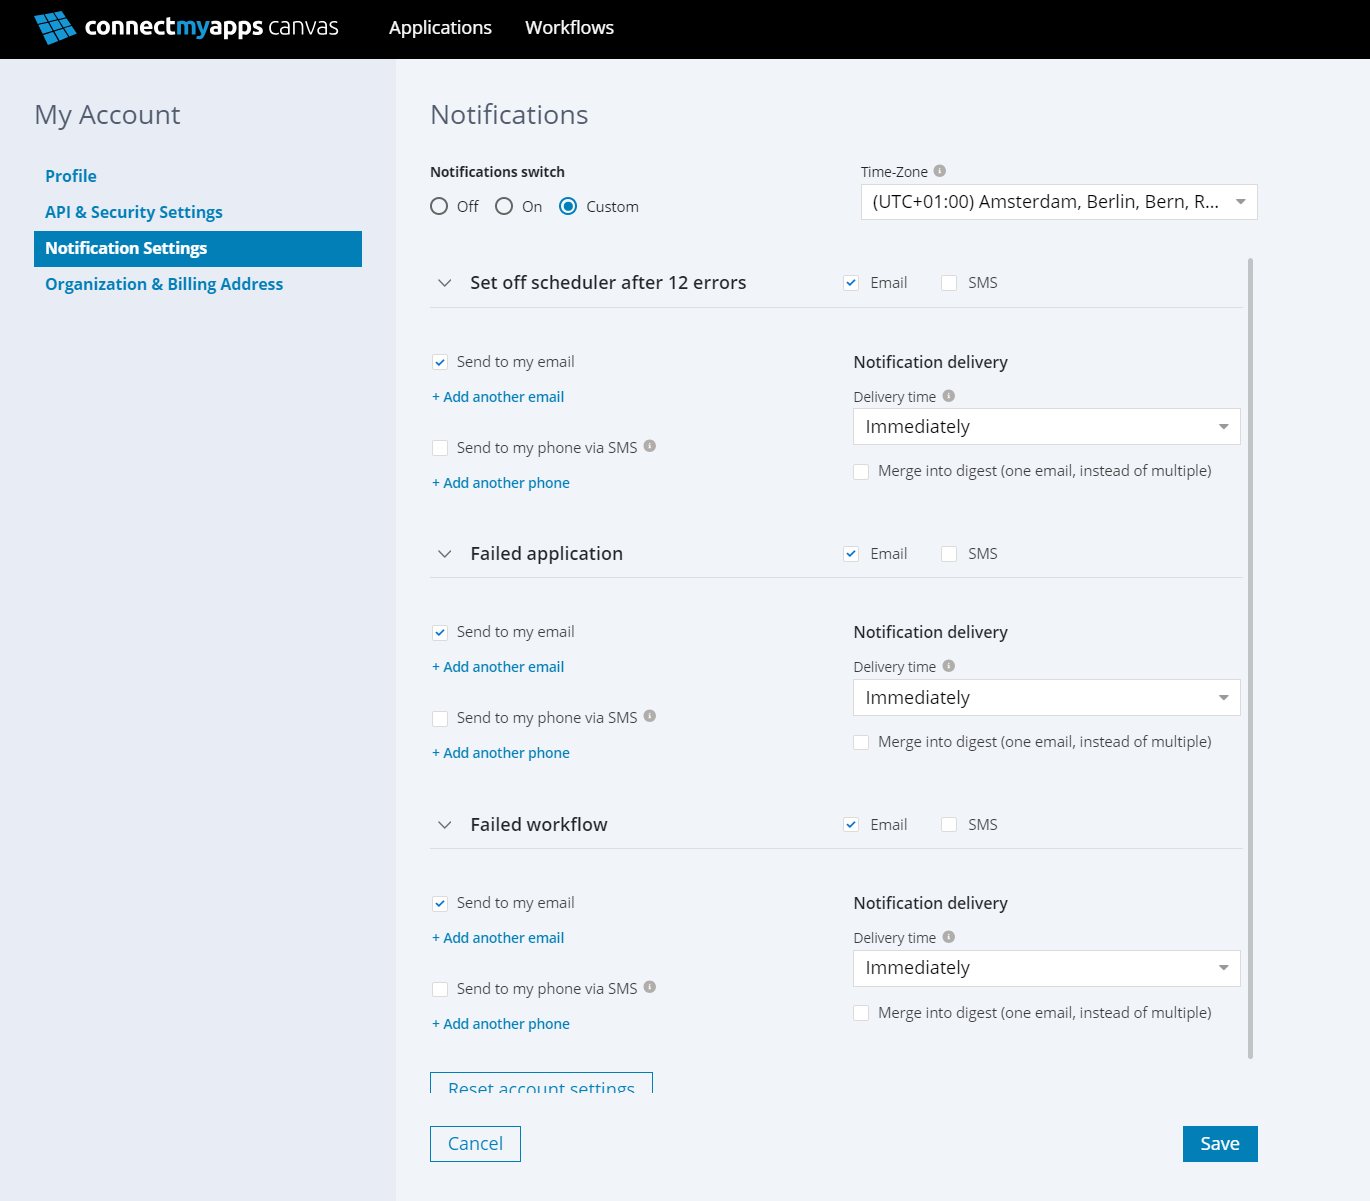
Hovering over the "i" icon will show you a tooltip with additional information.
Adding multiple notification recipients
Email
If you have selected the "Custom" option, you can click "+ Add another email" to send notifications to multiple email adresses.
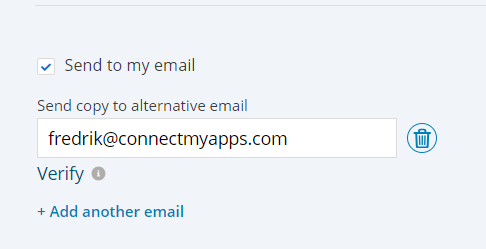
Enter the email address you want to receive notifications and click "Verify".
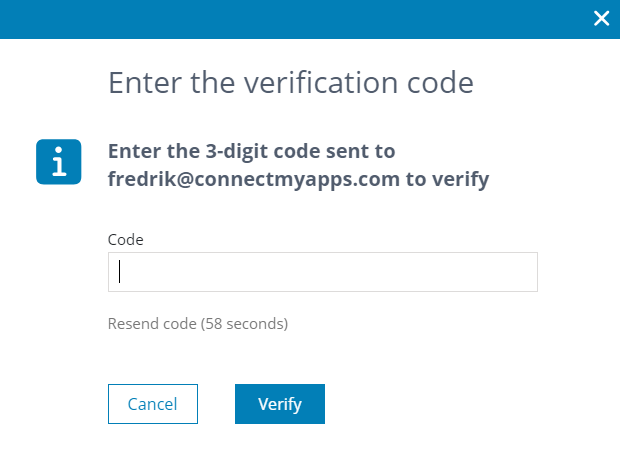
This will open a pop-up, and send a 3-digit code to the email you want to add for notifications.
Simply paste in the code and click verify. You will need to save your settings before the changes take effect by clicking save in the bottom right corner.

SMS
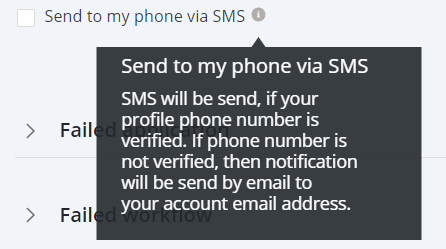
If you have selected the "Custom" option, you can also enable notifications by SMS. - NB! you will need to have a phone number registered in your profile.
Simply click the checkbox "Send to my phone via SMS"

You can click "+ Add another phone" to send notifications to multiple phone numbers.
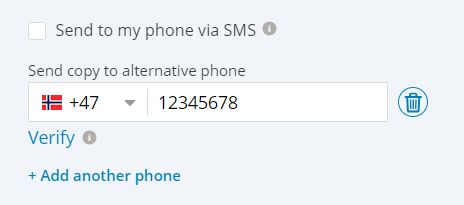
Enter the phone number you want to receive notifications and click "Verify".
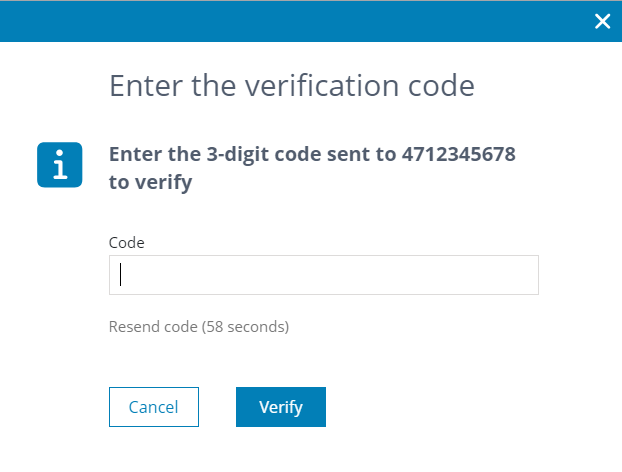
This will open a pop-up, and send a 3-digit code to the phone number you want to add for notifications.
Simply paste in the code and click verify. You will need to save your settings before the changes take effect by clicking save in the bottom right corner.
If you have any further questions not covered in this guide. Please contact us at support@connectmyapps.com