Evolution - Visma Lønn
The following guide will show you how to set up the Evolution - Visma Lønn workflow template for a new customer.
[!info] If the customer wishes to integrate multiple companies in Visma Lønn, then a separate Visma Lønn app and a separate workflow needs to be set up for each company (i.e. repeat step 2 and 3 for each company).
Step 1: Ask the customer to create a Canvas account
- The customer will need to register a Canvas account which the integration can be set up on.
- Please recommend to the customer that they enable 2-factor authentication to secure their account.
- When the customer has created a Canvas account please contact support@connectmyapps.com, so that we can enable you to manage their account.
Step 2: Add the applications
After completing step 1 you will be able to see the client account in the Client section:
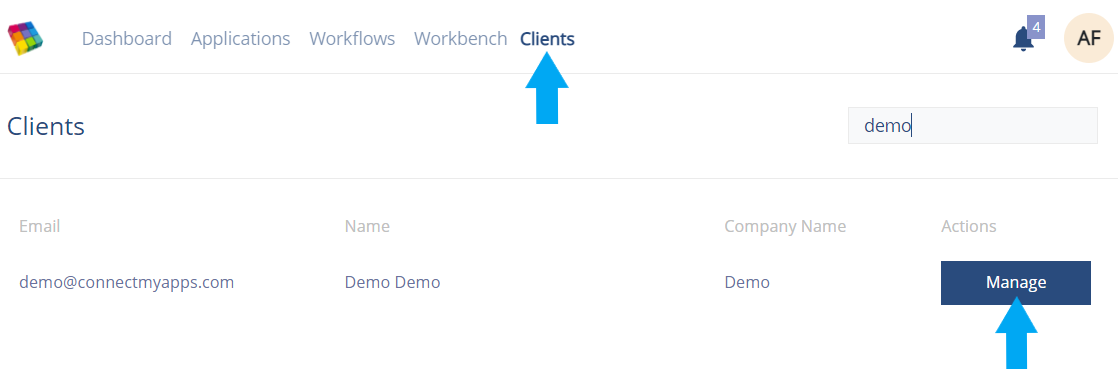 Click the Manage button to take control of the client's account
Click the Manage button to take control of the client account. This lets you make changes to the account settings, to see the apps and workflows registered on the account, and to make changes in their settings.
 A banner will appear on top indicating that you are managing the client's account
In the Applications section, register an Evolution app, and one or more Visma Lønn apps, as shown in these guides:
- https://connectmyapps.atlassian.net/wiki/spaces/CA/pages/81428481
- https://connectmyapps.atlassian.net/wiki/spaces/CA/pages/80248833
- You will also need to add the "Filehub" app, which is used for sending change reports via SecureShare email. No credentials are needed to register the Filehub app.
Step 3: Set up the workflow(s)
Now that the applications are added, we can go ahead and create the workflows. We will be using the ready-made workflow template for the Evolution - Visma Lønn integration.
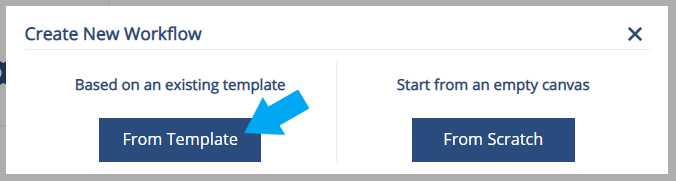
Head over to the Workflows section, and click the + icon to add a new workflow.
Select "From Template":
A) Select the template
Select the Evolution - Visma Lønn template called "Create/Update Employees" in the template list:
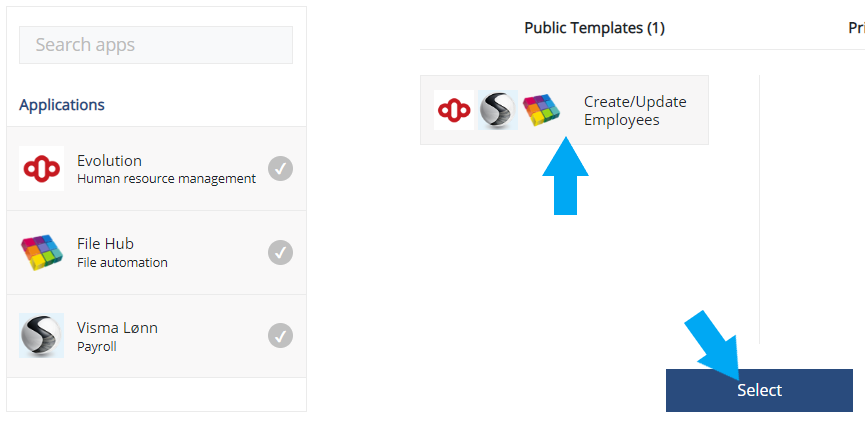 You can easily find the correct template by selecting the apps involved on the left side. The list will update to only show the available templates for those apps.
B) Select which registered apps to use
In the next step you will be asked to select which apps registered in the account you want to use for the workflow you are setting up.
[!warning] If there are many similar apps (for example, many Visma Lønn companies) registered in the account, be careful to select the correct app.
 If there are many similar apps registered in the account, make sure to select the correct one.
C) Configure the blocks
You will now be presented with the workflow "blocks", as defined in the standard workflow template:
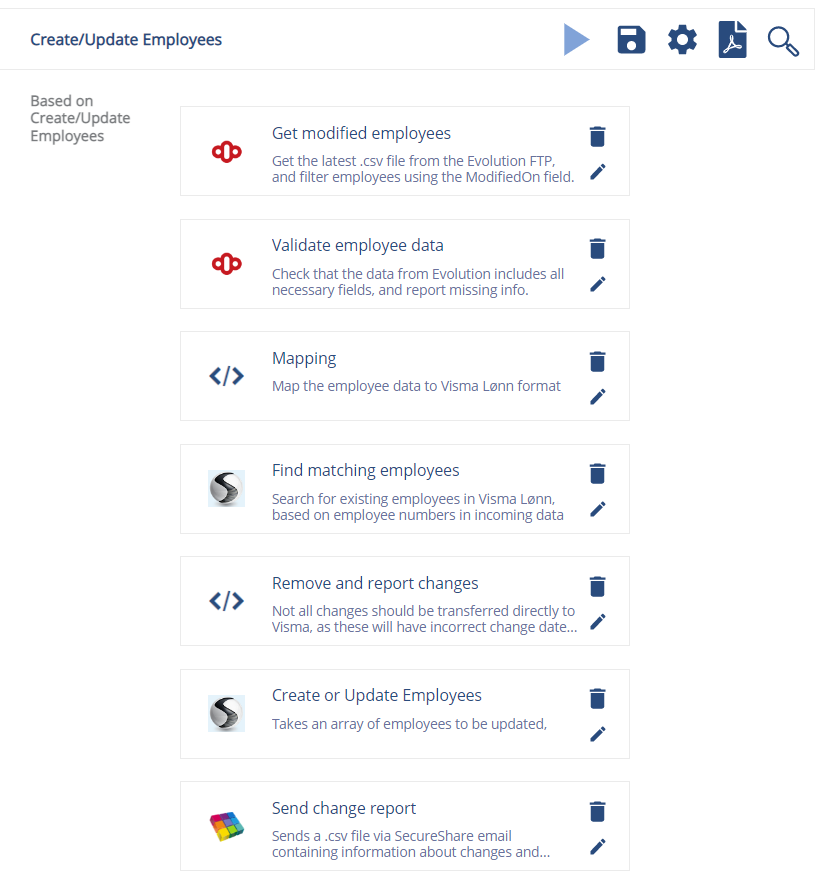 The "blocks" in the standard/template workflow.
The blocks are set up with standard settings and mapping. We will look at changing the mapping in step 4, but first we must fill in some basic settings and save the workflow.
Click the following blocks, and change the settings (under the "Working Area" tab):
Configure the "Get modified employees" block
Fill out the following fields:  Settings for the "Get modified employees" block
- The cliendId setting is used to filter the incoming data from Evolution on the "clientId" column, for cases where several companies are included in the data. Therefore it is important to make sure that the clientId field is set to the correct value.
- The ReadyForPayment checkbox should usually be checked.
- The "number of day" setting is usually set to 3
- The testing field is used to filter on certain employee numbers, to only transfer those employees during the test phase.
Configure the "Send change report" block
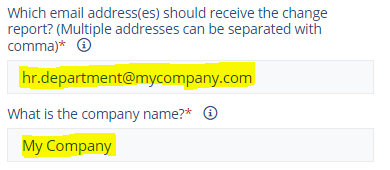 Settings for the "Send change report" block
- The email field is usually set to a shared mailbox for the HR department. You may want to add your own email address to this list during the test phase, to receive a copy of the change report.
- The company name is used in the title of the change report, to let the customer easily tell which workflow has generated the report, in cases where there are many workflows set up for the customer.
Name the workflow
Make sure to edit the name of the workflow to include the company name, as this will prevent confusion if there are more than one workflow set up for the customer:
![]()
Save the workflow
Press the save icon 💾 to save your work.
The workflow is now complete! In the next step we will look at changing the default mapping, to customize it for the customer's setup.
Step 4: Changing the mapping
(work in progress)
Step 5: Testing and going live
(work in progress)